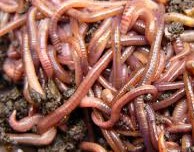
European Nightcrawlers
an All Purpose Worm
European Nightcrawlers (Dendrobaena hortensis, Dendrobaena veneta, Eisenia hortensis, or Eisenia veneta), are also known as the Euro's and ENCs. We will refer to them as ENCs for this article.
Why did I list so many names? ENC's used to be in genus Dendrobaena, but after more research was moved to the genus Eienia. The Eisenia hortensis and veneta are so similar that it would be very difficult to tell the two worms apart without expert knowledge.
The most thorough explanation in layman's terms that I've found is at this link. It's an interesting read that I recommend if you want a deeper understanding of worms.
At maturity, they can reach 6 inches, although 4-5 inches is the average. ENC's are best known as bait worms, but they also make good composting worms and are great for aerating the soil in your garden.
Anglers use ENCs to attract Crappie, Perch, Bass, Walleye, and Trout. Some anglers tear them into smaller pieces to catch Bluefish and Panfish.
ENCs do well in outdoor compost piles because they can burrow into the ground to avoid excessive heat, but will work up into the pile where food is plentiful as soon as the temperature is right.
Many gardeners have found adding ENCs to compact soil will improve aeration significantly, allowing for improved root growth.
ENCs have been reported to eat half their body weight or more in waste daily but understand what the worms eat. Worms eat the bacteria that are breaking down the waste. A pound of mostly fresh salad greens placed in a bin with a pound of worms will not magically disappear overnight. Waste that has already begun to decompose will be digested quickly.
The environment will also affect the speed at which your worms eat and reproduce. Cooler temperatures result in sluggish lazy worms, while temperatures that get too high may cause stress resulting in more time spent burrowing for a cool resting place.
I expect the worms in a fresh new bin to eat approximately 1/3 of their body weight. As the microbial activity in the bin increases, the food will break down quicker and the worms will consume more.
There are approximately 300-350 ENC's to a pound, and a pound of worms will need 1 square foot of space for comfort.
Reproduction
ENCs will self-regulate their population. If you have a pound of worms in a square foot of space they have room for very little reproduction, you'll need more space if you want more worms.
In regards to their reproduction, they are highly prolific. Usually, you hear that your worm population can double in 60-90 days. The math tells a different story! ENCs will lay 5-6 cocoons in a month and each cocoon will hatch an average of 4-6 tiny worms.
That means in a month of ideal conditions, 80-85% moisture, 55-75 degrees Fahrenheit, a pH balance of 6.0-7.0, and with an appropriate brown-to-green ratio, a single worm could produce between 20 and 36 baby worms!!!
They are not as prolific as red wigglers, but that's still a good increase.
Now unless you are a commercial worm farmer, you don't need to bother with the specifics. If your bin or pile is kept at a moderate temperature, the bedding stays damp, and you feed them when they run out of food, your ENCs will be healthy and happy.


Knowing how to set up a breeder bin is important whether you need more worms to handle your household waste or if you are starting a worm business.
We need to create an environment where the worms can easily find food and each other. They also need plenty of room because they naturally self-regulate egg production based on the available space.
My breeder bins are created using bedding that has already been through most of the composting process. I want the bedding to have very little recognizable material. This is what we call pre-compost.
Make sure the bedding is cool or your worms will bake!
Measure your container's surface space. Multiply the length times width, then divide this square inch number by 144 to convert it to square feet. Take this new number and multiply it times 50. I currently use the 12 qt Sterlite containers that I purchased from Walmart. The measurements are roughly 16" x 11".
16 x 11 = 176
176 / 144 = 1.22
1.22 x 65= 79 worms
I will count out 70, fat and healthy adult worms and place them in the container that has been pre-loaded with 3-4 inches of pre-compost. (Sexually mature, adult worms will have a noticeable clitellum, also known as a saddle)
I add a thin layer of shredded cardboard and place a small ice cube of blended food waste on top, sprinkle grit over top of it, then cover it up with the bedding. Place a marker over your feeding zone to make it easy to find later.
I add a cube of food waste at the beginning of each new week and sprinkle worm chow over the top in the middle of the week to make sure they have plenty of food.
I mark each bin with the date it was created and the date I need to pull the adult worms out. Currently, I pull the adults out at 30 days to start a new breeder bins unless I have an order for them.
I have seen that ENC cocoons could hatch anywhere between 18 and 42 days. I'm running my own test bin to verify and I will update this article with new information as soon as I can.
After counting the worms out individually for the first time it is easy to reuse those same worms to create the next breeding bins. I remind myself of this comforting tip every time I decide to add new breeding bins to the farm!
Ramping up your worm farm
Grow out bins
The cocoons left in the bedding after removing the adults will begin hatching into tiny wisps. They are skinny, with minimal color when they first emerge. That changes quickly though! They come out hungry and begin devouring food right away.
I only top feed with worm chow at the beginning of a new grow-out bin. I check the tops every other day to see if they are ready for more and feed as needed.
After they are eating 2 tablespoons of chow every two days, I'll switch to using ice cubes of pureed food. Most commercial worm farms stick with worm chow as the primary food source. We choose to stick with pureed food because one of our primary goals is to reduce food waste, and the worms love pureed food.
Important notes:
If you choose to use pureed food you will need to monitor the moisture content of any bed that does not drain. With practice, you will become a pro at adding the right amount of dry material under the food to keep moisture levels correct.
You will want to "fluff" the bedding before adding new wet foods. Food that has not been eaten, including bedding that has absorbed the moisture can become compacted. This compaction, if too damp, can become anaerobic. An anaerobic bed will smell bad, heat up, and put off gasses that are toxic to your worms.
We move Red Wigglers out of the grow-out bin around day 40, the earliest they will reach sexual maturity. If I don't have a current order for worms, they will be added to a larger castings production bin or used to create new breeder bins.
