
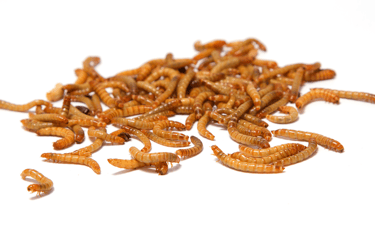
How to Raise Mealworms at Home (The Simple Way)
Mealworms turned out to be one of the more unexpectedly useful things on our homestead. We've fed them to our chickens, toads, axolotls, and wild birds. They make excellent fishing bait.
They're quiet, low-maintenance, and take up almost no space. Once you understand a few basic principles, they practically take care of themselves.
Container and Substrate
You don't need a fancy setup. We use cat litter boxes from the Dollar Tree — shallow, affordable, and easy to clean. A single layer of mealworms across the bottom is all you're after. Crowding causes problems; spread them out.
For substrate, wheat bran is our go-to. It's lightweight, which keeps airflow good even when mealworms burrow into it. Dense substrates like cornmeal or oatmeal trap moisture, and moisture is your biggest enemy. Mold follows moisture, mites follow mold, and suddenly you have a real problem on your hands.
Before you use any substrate — even wheat bran you've purchased pre-treated — heat treat it yourself. Pour it into a baking pan with plenty of room to stir.


Pour your bran into a baking pan with plenty of room to stir. Set your oven to between 170°F and 220°F, then put the pan in for about 15 minutes. (I've had ovens that did great at 180, and another that needed 210)
Your goal is to get the bran to 150°F all the way through. According to research on stored grain pests, most insects and mites die within an hour at 122°F and within a minute above 144°F (Fields, P.G., Journal of Stored Product Research, 1992). At 150°F, you have a solid margin above both thresholds.
To check the temperature, insert a probe thermometer halfway down into the bran in several different spots. Don't stir before checking, and don't let the probe touch the bottom of the pan — that will give you a false reading.
If every spot reads 150°F or higher, give the bran a good stir and return it to the oven for 5 more minutes, then turn the oven off. If any spot reads below 150°F, leave it in a little longer and check again. This temperature has been researched to kill pests.
Once it's done, remove it from the oven and allow it to cool completely before sealing. Get it sealed up fairly soon — open bran can pick up hitchhikers quickly, and even treated bran is vulnerable between the bag and your bin. This step is always worth doing.
For storage, pour what you'll use soon into airtight jars and put the rest into gallon or 2-gallon zip-lock bags in the freezer. This way you only have to heat treat once — just pull from the freezer as you need it. If you don't have freezer space, only heat treat what fits in airtight containers and do a fresh small batch when you run low.
Feeding
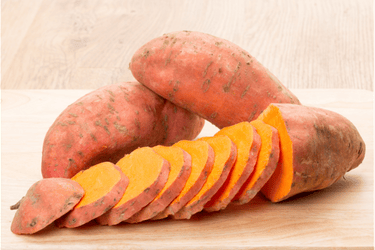
Mealworms get their moisture from food rather than a water dish. Root vegetables are our staple — sweet potatoes are my favorite to use, but carrots and regular potatoes work well too.
We also feed the cores and stems left over from lettuce, cabbage, broccoli, and cauliflower. I think of these as "dry moisture" foods — they hold a good amount of water internally, but they don't seep into the substrate the way juicy produce does.
That distinction matters. You want your mealworms to draw moisture from their food without that moisture ever reaching your bran.
Whatever you feed, pull it out within 24 hours. Don't leave food scraps sitting in the bin.
Underfeed on purpose. This is the most important habit you can build. It's easy to add a little more next time if they've cleaned up what you gave them. It is very difficult to salvage a wet, moldy bin. When in doubt, give less.

The Life Cycle
Mealworms go through four stages: egg, larva, pupa, and beetle. Each stage has its own needs, and knowing what to expect at each one is what separates a thriving colony from a frustrating one.
We've written a full breakdown in our Mealworm Life Cycle Guide — including what to look for, what goes wrong, and how to fix it.

Short-Term Storage
If you want to keep purchased mealworms alive without running a full colony, the refrigerator is your friend. Put them in a ventilated container with substrate and slide them in. They go into stasis around 45–50°F and can hold that way for weeks at a time.
The key is a simple rhythm: two weeks in the fridge, one day out to warm up and feed, then back in. A carrot piece on top of the substrate is all they need on their day out.
Repeat that cycle, and you can keep mealworms alive and healthy for a couple of months with very little effort.

We raise mealworms here on the farm. If you're local to Hickman County and want to skip the startup phase, we sell them in quantities from 25 to 1,000 when available. Wheat bran is available too — 1-pound bags standard, larger quantities on request. Reach out at info@restoringrootsranch.com.
Want to understand why mealworms are worth raising in the first place? Visit our Why We Raise Mealworms article. Ready to go deeper on the biology? Our Mealworm Life Cycle Guide has everything you need.